-
- May 7, 2020
How does your website perform when your potential customers search on Google?
The best traffic you can ever get to your website is traffic that comes from a Google search from a customer already looking for the services you provide. It's exponentially more powerful than traffic from paid ads or even from social media. The reason for this is because of "intent". These customers are actively looking for the services you provide. You want to make sure your website is performing well in Google search.
The other day I showed you some of our Google search statistics.
These stats show you how much traffic you're getting from Google search, and how it trends over time. You can use this to determine the impact of the changes you make to your website or your marketing.
The stats I showed you indicated a clear increase in performance since I started doing these daily videos posting them to the website and to social.
I promised that I'd show you how to get that set up for your website. So here it goes... watch the video or follow the steps with screenshots.
Video Guide
Step by Step Guide
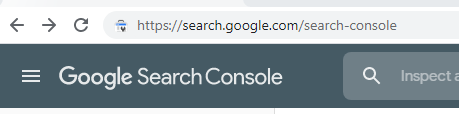
Step 1: Go to Google Search Console
Go to https://search.google.com/search-console.
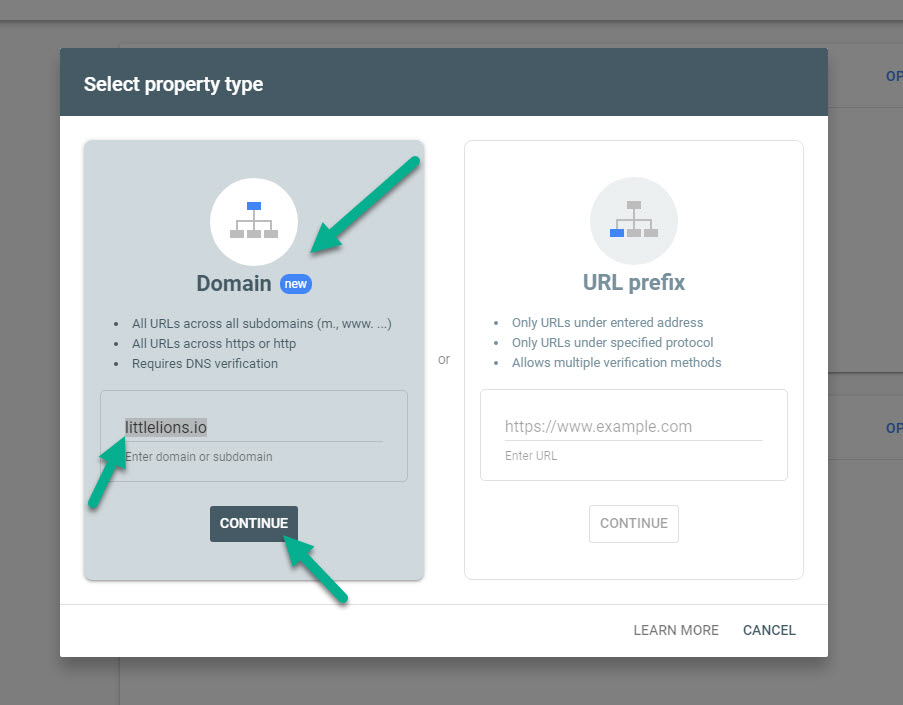
Step 2: Choose the Domain Option and Type in Your Domain Name
You want to be sure to use the new option 'Domain'. Then type in the domain name you want the stats of and click on the 'Continue' button. It will take just a few moments to validate the URL as an active website.
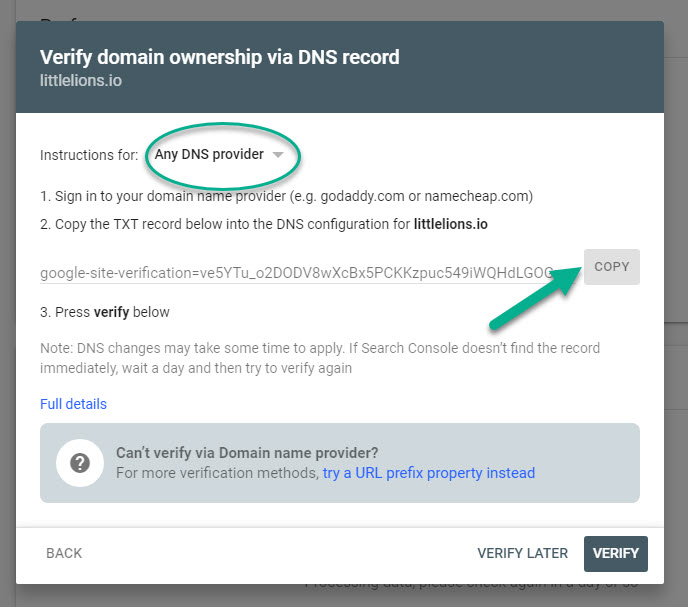
Step 3: Verify the domain
Now they will as you to verify that you do own the domain by getting information from your DNS record.
Copy the code you're given but clicking on the 'COPY' button.
In the 'Instructions for:' you will see a dropdown box where you can select your registrar, which is where your Domain is registered.
When you select your provider, you'll get the guide for that specific registrar. If you don't see your registrar on the list, a simple search for their support documents via Google on how to set up a TXT record should find what you need. Or just log in to your domain name provider and look for the DNS management or DNS records settings. You'll need this for the next step.
Step 4: Create the TXT record
Once you've located the DNS settings in your domain registrars admin site, you want to create a new record.
The instructions and screenshot below are for 1stDomains here in New Zealand but it will be very similar regardless of your registrar.
Enter the domain again, then make sure that the record type is for TXT. Then paste in the code, you copied from the previous step. Finally, click on the 'Update' button.

Step 5: Wait...
It's going to take anywhere from half an hour or more before your new TXT record becomes active on the internet. Leave the Google Search Console screen open to come back to later.
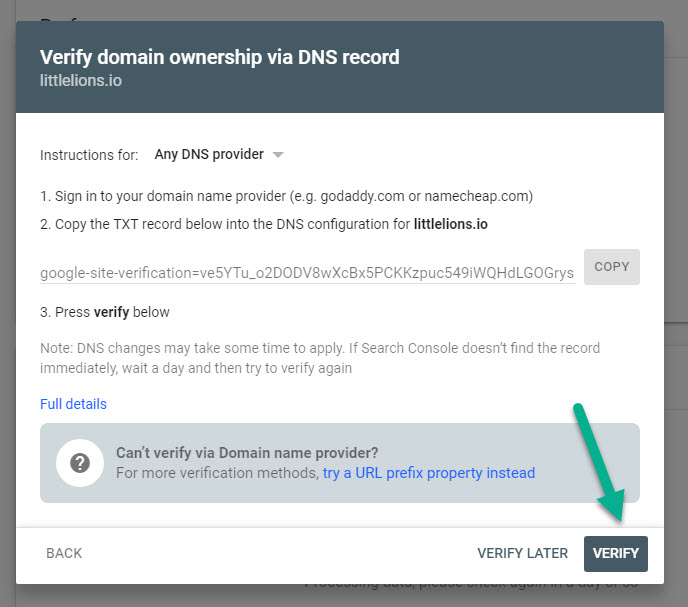
Step 6: Verify Ownership
Once you've come back to the screen, click on 'Verify'. This will go off and check for the TXT record and verify you own the domain.
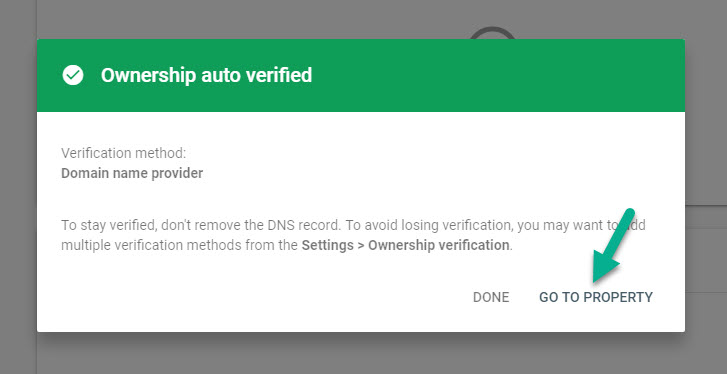
Step 7: Go to Property
You should get a green result at this point. If you get a red failed result you may just have to wait for a little longer. If after a few hours without a green result there is probably an issue. Feel free to reach out and let us know so we can help.
After a green result, click on 'Go To Property.'
Step 7: Wait for a Day
Your stats page will load up straight away but it will empty while Google processes your search statistics. Bookmark the page and come back in a day or so to see your data.
I'll do another video soon how to navigate your statistics and determine any trends.
Further Reading
To go back to the basics read my post that covers the 6 things endurance coaches should know about SEO. Once you know the basics you should always keep on top of What your potential customers are searching for via Google Search Insights.

Cam Langsford
Enthusiastic age group triathlete, software architect and founder of health and fitness community platform "Training Tilt".
Take our Free "Authentic" Marketing Course for Coaches
Designed for endurance sport coaches. Marketing doesn't need to be pushy. The best marketing simply creates a win-win relationship between you and your customers. Take the simple 6 part course to learn more.