-
- October 29, 2017
Ever get the feeling you are repeating yourself when you get new coaching clients?
There is a lot of information they'll need to get started. Some of it obvious, some not so obvious. First impressions matter so a clean organized on-boarding process is crucial.
It's easy to fall back into a position where you are too relaxed with getting new clients set up with your processes and systems. Because you are used to how things work it's easy to assume that new clients will be able to easily slot in and get started. Regardless of how simple or complex your systems are it's easy for new clients to get overwhelmed.
Let's step back a bit, what is onboarding?
Don’t make the mistake of assuming your current customer service structure will take care of the client onboarding process as this can lead to clients that become frustrated and cancel. Client onboarding is one of the most important functions for any business because it directly affects the client’s experience with your company, which will affect profits - https://tallyfy.com/definition-client-onboarding/
You might already be doing onboarding which takes up a lot of your time or you might be thinking you can't afford to spend too much time onboarding each client one-on-one when you need to actually get stuck into helping them with their training and their performance.
In this post, I'll describe how to use automated emails to help onboard you new clients without having to manually show them the systems you use. This frees up the one on one time you can spend with them for coaching instead.
This process can work just as well for one on one clients as it will for those using your generic training plans or are part of one of your online memberships.
Word of warning: This process does not and should not replace the one on one nature of your services. You should of course still welcome them personally as I'm sure you already do. This simply automates the boring admin stuff so you can spend more time actually coaching and less time shuffling paperwork.
What problems can onboarding solve?
Miscommunication and incorrect assumptions always lead to problems. Avoiding this is crucial to establish good relationships with your clients. An informal discussion is rarely good enough to avoid these problems and two parties always leave a discussion with a slightly different interpretation. Here are a few other problems you can avoid with a good onboarding process.
- Miscommunication and misunderstanding
- Avoid answering the same questions from dozens of different clients
- Avoid having to chase your clients for the info you need
- Save time by not having to manually ask them for info
What sort of things should be included in client onboarding?
There is a bunch of things you'll need to get setup with a new client, some things will just be informational others will require your clients to take some sort of action. Triggering all these things can be automated in some way.
Here are some ideas, you'll have some of your own extras to add to the list. If you don't have this formally recorded somewhere, now's probably a good time to note them down. A good checklist always adds value.
- Info about how your clients need to pay you.
- Info about how your clients can get in touch with you.
- Info about what your clients are entitled to as part of your service
- Collection of personal information like height, weight, health conditions etc.
- Completion of a waiver form or acceptance of terms and conditions
- Information about the regular feedback you require. Weekly updates etc. Maybe even a weekly form to submit.
- Information about what to do if the client gets injured.
- Information about partner companies, discounts etc and any other additional benefits they are entitled to.
Setting up the process
Note: Not everyone has the same technical skills, or you might just prefer someone to do it for you. If that's the case get in touch with us at services@trainingtilt.com as we offer a setup service for this sort of thing for a small fee. But if it's something you think you can handle, here are all the steps required.
The processes I discuss use a combination of the Training Tilt platform and Drip but for the most part, can be completed without Training Tilt or with any other automated email system like Mailchimp etc. Obviously, Training Tilt makes it easier and more automated but with a few manual steps, you can easily implement the onboarding even if you aren't a Training Tilt customer.
Although the process can mostly be automated it's important you make the emails personal and assure your new clients that you are just a reply away at the other end of the emails. Your clients should feel they can easily ask questions when they need more information or clarification.
The great thing about Drip is that it is free for up to 100 subscribers (read clients) so if you are just using it for onboarding your one on one clients you could use it for free forever. Bear in mind though it's a super powerful marketing tool too so consider kicking on into a paid plan to help grow your business.
Setting up your Drip account
It's easy to signup for the free version, just head over to Drip and get started straight away. Once you've set Drip up get in touch with us and we can hook it up to your Training Tilt account so your clients and information about them get sent over to Drip automatically. For those who aren't Training Tilt customers, don't worry I'll talk through the manual step later on so you can still make it work. Of course, we'd prefer you to signup to a free trial with us to make things a bit easier but it's not required.
Setting up your Training Tilt account
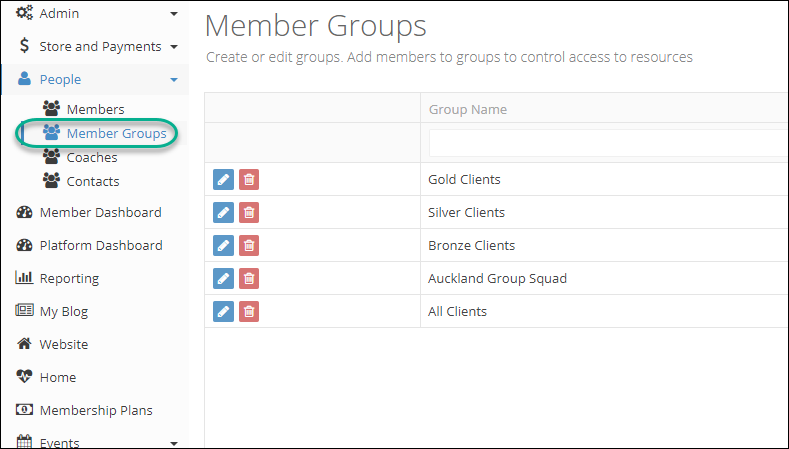
The key here is to make sure your clients are mapped to appropriate groups in Training Tilt. You should create your own groups that make sense to how your business works based on the different tiers of coaching you offer. It's good to create at least one group for each type of client. You can create a group from the People - Member Groups menu item. Some clients might be in more than one group. It's a good idea to create a general group too that all your clients should be added to because some things might apply to all your clients across the board.
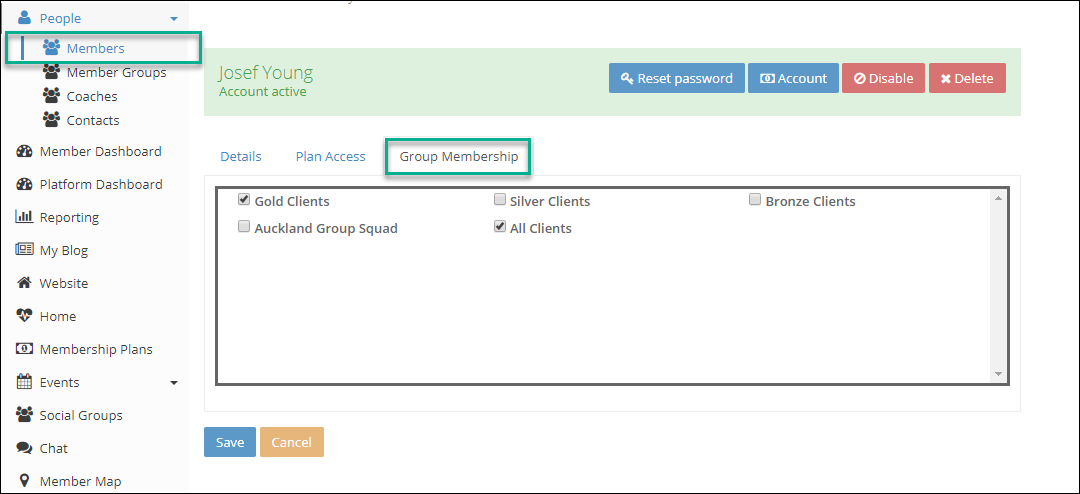
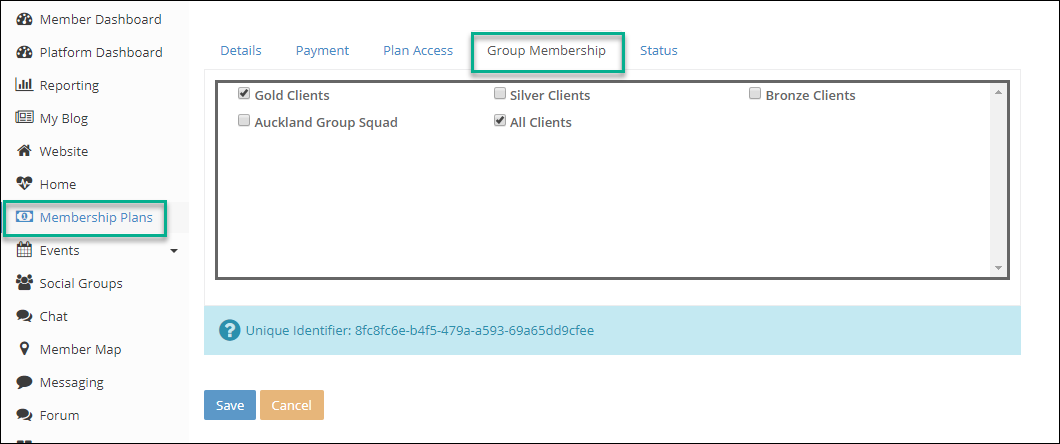
Once you've created the groups you'll want to assign them to your clients. You can do that manually for existing clients by going to the member list then clicking to edit the client and linking up the groups from the groups' tab. For new clients, the easiest way to do it is to link the groups to your membership plans, so when a new client signs up to one of your coaching plans they'll automatically be added to the groups.
Assigning groups directly to clients
Assigning Groups to Membership Plans
When clients are assigned to groups in Training Tilt the information is automatically sent over to Drip.
Setting up forms/questionnaires in Training Tilt
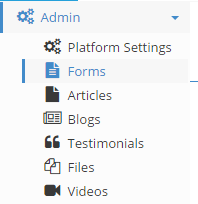
You'll probably have some forms, questionnaires or waivers you need your clients to fill in, you can use the Training Tilt forms feature to create these forms. Here's all the info on how to do that in our support article. Once you've created your form use the "live view" button and grab the link to the form from the address bar, you'll need that to paste into your onboarding emails.
Setting up the emails in Drip
Now you need to setup your automated emails in Drip. You can do that by creating a campaign in drip made up of one or more emails. It's a good idea to have more than one email especially if there is a lot of things you want to share and important things you want your athletes to do. Here is a guide on a typical setup. A rule of thumb is to set these up a day between each email. You'll have your own process but this is a good guide.
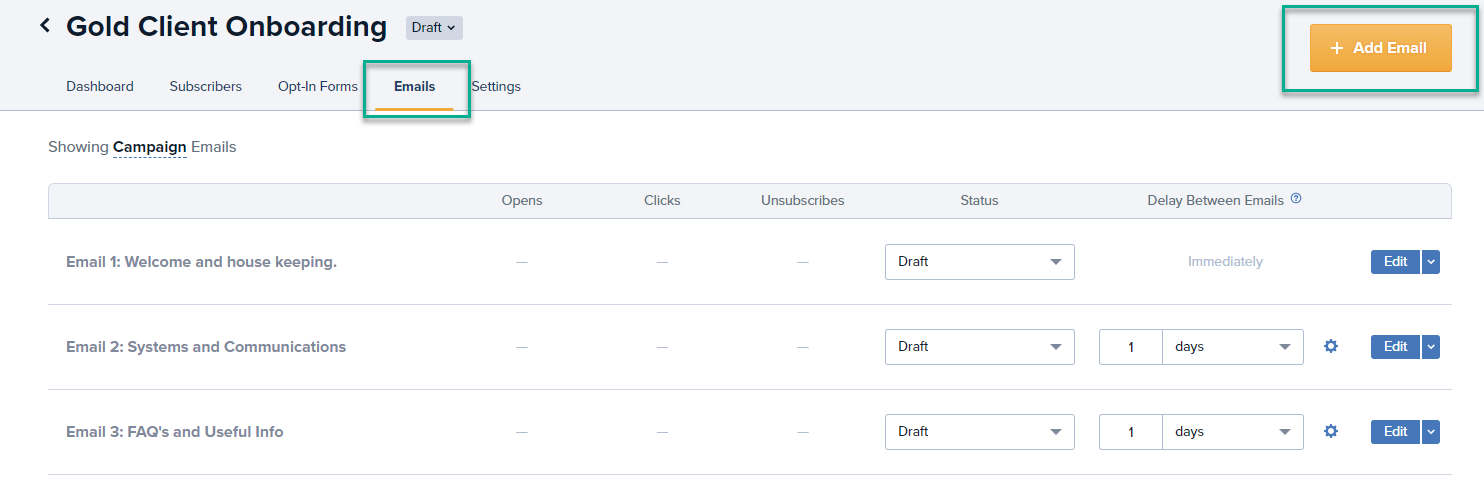
- Email 1: Welcome and housekeeping. This email can include links to important forms like "Personal information form", "Waiver form" etc along with all your contact details etc.
- Email 2: This could include information about the systems you use for coaching, where they need to log in and how they get started. It could also include what they are entitled to as clients and how and when to contact you and what you expect of them as clients.
- Email 3: This could be more generalized and include a link to your Frequently Asked Questions (so you don't have to answer them over and over again). It could also include links to some of your popular blog posts, information on how to avoid and manage injury and other general guidance around training, nutrition, and recovery.
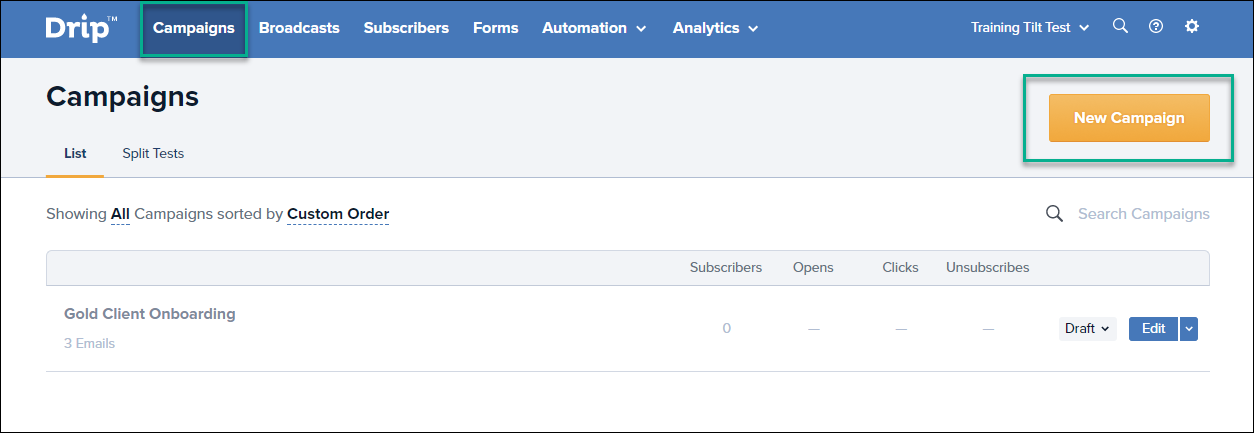
Now log into your Drip account and create a new "Campaign". For this type of Campaign start from scratch rather than using one of their templates. Create each of the emails, I like to create all the empty emails first before actually writing the content one by one, that you get the structure in place first. So just use the "Add Email" button to create all your empty emails. Give them sensible names so at a glance you can always tell what they are for. The worse thing ever is to have lots of things floating around title "Email 1" and you have to actually click on it to figure out what it's for. Also, make sure you give the campaign itself a sensible name too like "Gold Client Onboarding".
Creating a Campaign
Creating Emails
Now go in and type the content of each email. Or if you want to come back to that later after we've set up the full process. The writing of the emails will probably take the longest time to finish.
Setting up the workflow in Drip
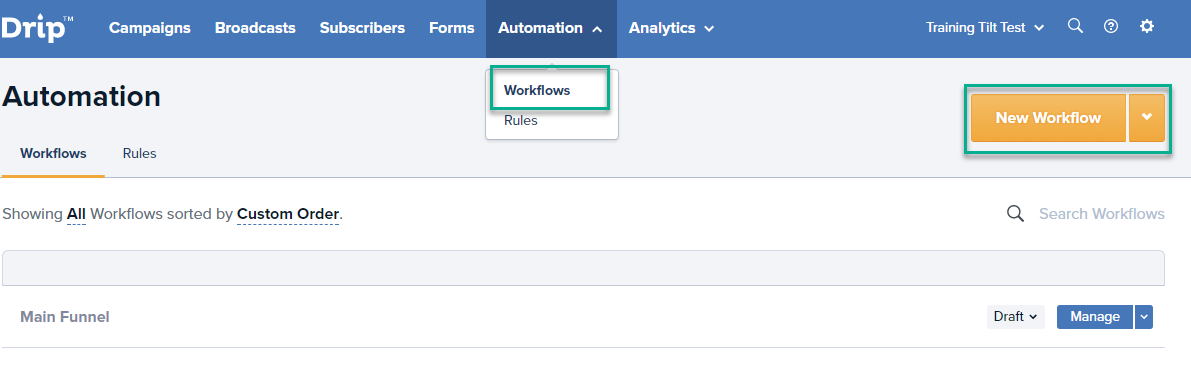
The workflow is what we'll use to trigger the campaign emails for each client. There are a couple of ways to do it using either a "Workflow" or a "Rule". Let's use a Workflow. Workflows are good because you can do a bunch of stuff based on the same trigger. We only really need to do one thing in this instance but it's good to have flexibility if you want to add stuff later. Create a new "Workflow" from the "Automation" menu. When you give the Workflow a name make it meaningful based on what the workflow is about. I'm going to call mine the "New Gold Client Workflow" because it's the workflow that runs when we get a new Gold Client.
Creating a new Workflow
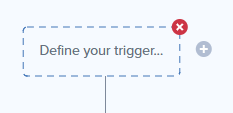
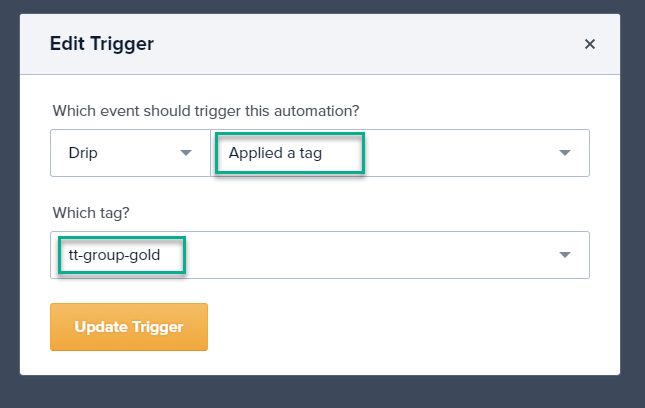
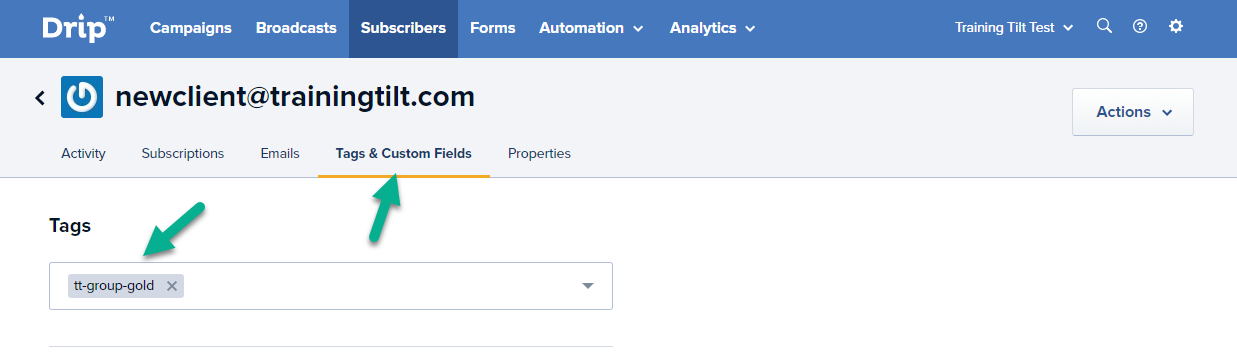
Define the Trigger. This is the thing that we are watching for to start the workflow. In this case because of the way Training Tilt integrates with Drip by sending tags we want to use a tag trigger. We want to use the tag based on the group membership we set up earlier in Training Tilt. Training Tilt sends across the tags for groups in this format tt-group-your-group-name where your-group-name is the name of your group with the spaces replaced with hyphens. Just note that you do NOT have to create your tags manually in Drip. If the Training Tilt Drip integration is correctly set up the tag should already exist in Drip. If it's not there, add a test user to the group in Training Tilt first and save it, then check in Drip again. If it's still not there then get in touch with us and we'll figure out what's wrong. I'm going to use the tag tt-group-gold because that's the group I want to send my onboarding emails to.
Note for those without a Training Tilt account: If you don't have a Training Tilt account then you can just create a tag manually, when you start typing a tag it will give you the option to add it as a new tag if it doesn't already exist.
Defining the Trigger
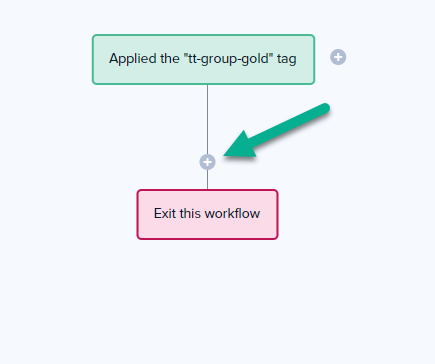
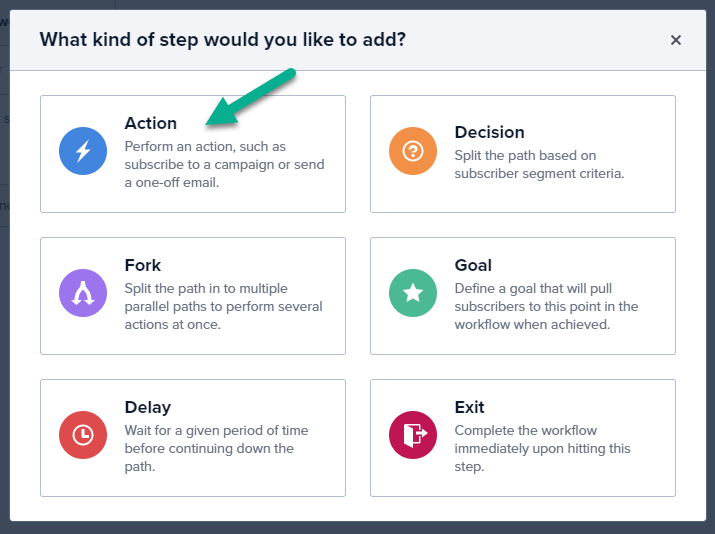
Defining the Action
We now need an action that will push the client into the onboarding campaign so they start getting the emails.
Add an action
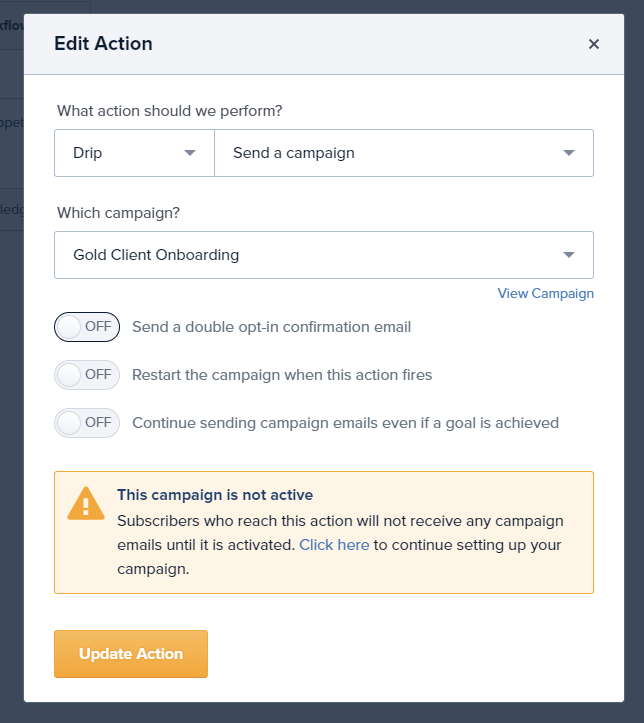
Now we just select the "Send Campaign" action and select our "Gold Client Onboarding" campaign.
Turning it all on
Once you've got the process all set up and the emails are written you'll just need to make sure both the campaign and the workflow are turned on.
Turning on the Campaign
Make sure all the emails are saved and not as a draft.
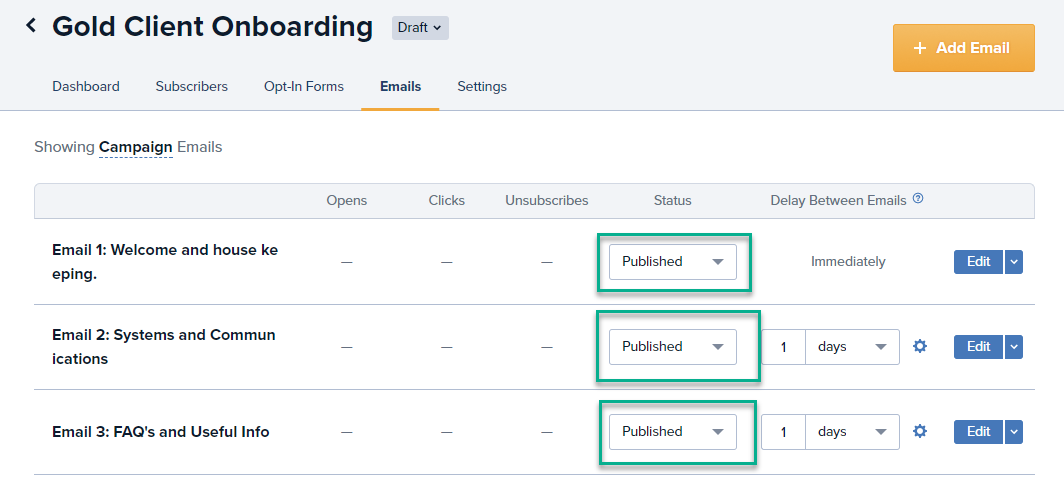
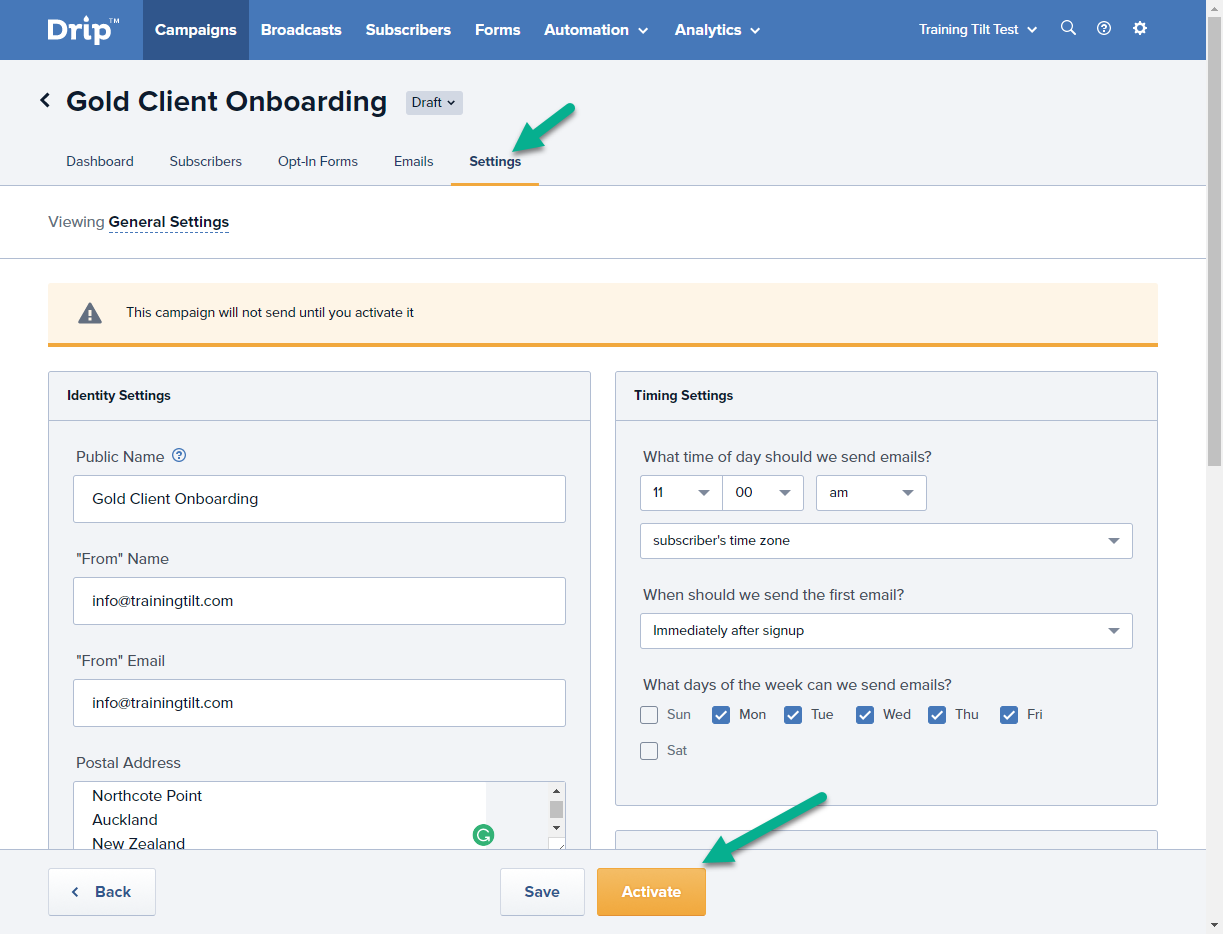
You'll need to make sure you've filled everything required out on the "Settings" tab and then click the Activate button.
Starting the Workflow
Go back to the Workflow and make sure it's been started.

Final Testing
Now you'll want to test this out to make sure it works. Create a test athlete account in Training Tilt and link the account to the correct membership plan or link it to the correct group manually to simulate a new client on a Gold membership. After a few minutes, you should have received the first email. If not double check everything to see what might be missing, then if you get stuck get in touch and we can take a look at it for you.
Here is a quick checklist to go through to troubleshoot before getting in touch with us.
1. Have you asked us to connect your Drip account with your Training Tilt account?
2. Is the Campaign in "Active" status?
3. Is the workflow started?
4. Is the test client correctly mapped to the correct group in Training Tilt?
Note for those without a Training Tilt account: If you don't have a Training Tilt account then the tag trigger for the workflow won't fire automatically. So when you get a new client you'll need to do two things.
1. Create the subscriber (your client) in Drip manually.

2. Tag the subscriber with the tag you used in the trigger of the workflow.
Conclusion
Now after a little bit of effort, you've now put in place a big time saver that will ensure your clients start with a great experience and get all the information they need to make the most of your services.
If this seems like a bit too much work or beyond your own technical skills, or you'd just rather someone else do it for you then get in touch with us at services@trainingtilt.com. We offer a setup service for a small fee. We can take care of creating your Drip account and setting up the automation along with configuring your Training Tilt account correctly. All you'll need to do is take care of the actual content that needs to go in the emails.

Cam Langsford
Enthusiastic age group triathlete, software architect and founder of health and fitness community platform "Training Tilt".
Take our Free "Authentic" Marketing Course for Coaches
Designed for endurance sport coaches. Marketing doesn't need to be pushy. The best marketing simply creates a win-win relationship between you and your customers. Take the simple 6 part course to learn more.